Best Electric Dirt Bike Accessories: Essential Upgrades Every Rider Should Have
Best Electric Dirt Bike Accessories Buying an electric dirt bike is only the beginning of the riding experience. Whether you

Whether you’re heading to a local trail, traveling to a race, or taking your bike on a weekend adventure, transporting an electric dirt bike correctly is just as important as maintaining it. A poorly secured bike can shift during transit, damage expensive components, or even become a road hazard.
Fortunately, transporting an electric dirt bike isn’t complicated. With the right equipment and a few proven techniques, you can load, secure, and unload your bike with confidence while minimizing the risk of scratches, bent handlebars, damaged suspension, or loose tie-downs.
This guide covers everything you need to know—from choosing the right vehicle to securing the bike properly and avoiding the most common transport mistakes.
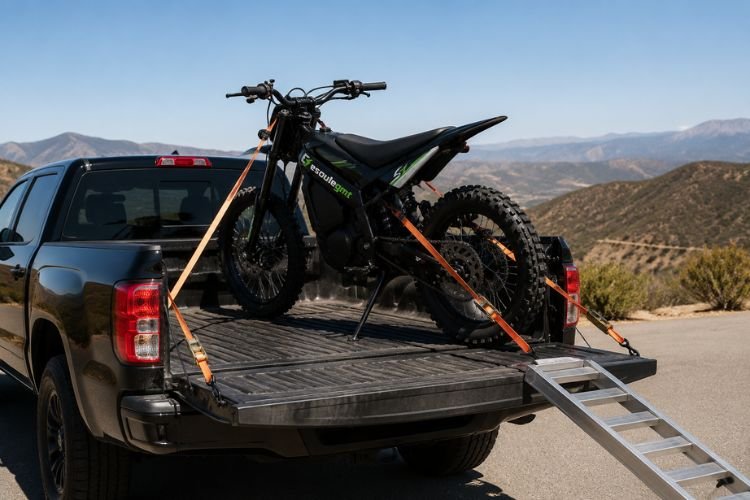
The safest way to transport an electric dirt bike is to load it onto a pickup truck, trailer, or cargo van using a sturdy loading ramp, then secure it with four high-quality tie-down straps attached to solid anchor points. Keep the bike upright, avoid excessive suspension compression, and check the straps after driving a short distance to ensure everything remains secure.
For the best results:
Loading an electric dirt bike starts long before the wheels touch the ramp.
Taking a few minutes to prepare the bike can make loading easier and help prevent damage during transport.
Always switch the bike off completely before loading.
This prevents accidental throttle input while pushing the bike up the ramp and reduces the chance of unexpected movement.
If your model includes a removable key or battery disconnect, follow the manufacturer’s recommendations before transport.
Anything that can move during transport should be removed or firmly secured.
This may include:
Loose gear can fall off during the trip or rub against the bike, causing unnecessary scratches.
Before loading, take a quick look at both tires.
You’re not checking for perfect pressure—you’re making sure there are no obvious punctures, damaged sidewalls, or objects embedded in the tread.
A flat tire makes loading more difficult and can allow the bike to shift while it’s strapped down.
Not every part of the bike is designed to handle the force created by ratchet straps.
Before loading, locate sturdy attachment points such as the lower triple clamp, handlebars (when used with soft loops if appropriate), or other manufacturer-recommended locations.
Avoid attaching straps to:
Choosing the correct tie-down points from the beginning helps keep the bike stable throughout the journey.
The best way to transport an electric dirt bike depends on how far you’re traveling, how often you ride, and the type of vehicle you already own.
For many riders, a pickup truck is the most practical option.
A quality loading ramp and four properly positioned tie-down straps are usually all that’s needed for safe transport.
Best for:
Advantages:
Things to consider:
A utility trailer offers more room and often makes loading easier, especially if you’re transporting more than one bike.
Many riders also appreciate the lower loading height compared with a truck bed.
Best for:
Advantages:
Things to consider:
If you travel frequently or cover long distances, an enclosed trailer provides the highest level of protection.
In addition to shielding the bike from weather, it offers extra security when making overnight stops.
Best for:
Advantages:
Things to consider:
A cargo van combines weather protection with the convenience of an all-in-one transport solution.
It’s particularly popular with riders who travel frequently or want to keep their bikes out of sight.
Best for:
Before loading, make sure the bike can fit safely without forcing the handlebars or front wheel into awkward positions.
| Transport Method | Best For | Main Advantage | Keep in Mind |
|---|---|---|---|
| Pickup Truck | Local rides | Quick and convenient | Exposed to weather |
| Utility Trailer | Multiple bikes | Easy loading | Requires towing |
| Enclosed Trailer | Long trips | Maximum protection | Higher cost |
| Cargo Van | Frequent transport | Secure and weatherproof | Limited by interior dimensions |
Pro Tip: If you’re loading the bike by yourself, focus on keeping it balanced before reaching for the straps. Most loading mishaps happen in the few seconds between rolling the bike into position and securing the first tie-down.
Having the right equipment makes transporting an electric dirt bike safer and much less stressful. Fortunately, you don’t need an elaborate setup—just a few reliable tools that are designed for motorcycle transport.
Here’s what most riders use:
| Equipment | Purpose |
|---|---|
| Loading ramp | Safely roll the bike into a truck, trailer, or van |
| Quality tie-down straps | Secure the bike during transport |
| Soft loops | Protect handlebars or other approved attachment points from strap damage |
| Wheel chock (optional) | Helps keep the front wheel stable while securing the bike |
| Microfiber towel or moving blanket | Prevents scratches where equipment may contact the bike |
| Work gloves (optional) | Improves grip while handling straps and ramps |
Before every trip, inspect your straps for fraying, damaged hooks, or worn stitching. Replacing a questionable strap is far less expensive than repairing a bike that falls over during transport.
Loading is where most transport-related accidents happen. Taking your time is usually more important than using extra force.
Place the ramp on a stable, level surface and make sure it’s securely attached to the truck or trailer if the manufacturer recommends it.
A ramp that shifts while you’re halfway up is one of the biggest loading hazards.
If possible, choose the flattest loading area available to reduce the ramp angle.
Instead of riding the bike into the truck, walk beside it while keeping both hands on the handlebars.
Use the front brake when necessary to control the bike’s speed and maintain balance.
If the bike feels too heavy to manage safely on your own, ask someone to help stabilize it rather than trying to rush the process.
Once the bike is inside the truck or trailer, place the front wheel against the front wall, wheel chock, or another secure stopping point if your setup includes one.
Keeping the front wheel straight makes it much easier to secure the bike evenly.
Before reaching for the straps, take a moment to make sure the bike is balanced.
Many riders lean the bike slightly while searching for the first strap, which increases the risk of a tip-over.
If you’re loading alone, temporarily supporting the bike with a wheel chock or having one strap ready within reach can make the process much easier.
A properly secured bike shouldn’t rely on one strap doing all the work.
Instead, each strap should share the load and keep the bike stable from multiple directions.
Start with the front of the bike.
Attach soft loops to appropriate tie-down points if needed, then connect the tie-down straps to the vehicle’s anchor points.
As you tighten each side, alternate between the left and right straps to keep the bike centered.
The goal is to hold the bike firmly upright—not to force the suspension to its limit.
Rear straps help prevent the bike from moving sideways or bouncing during travel.
Depending on the bike and your transport setup, approved attachment points may include parts of the frame or swingarm recommended by the manufacturer.
Avoid attaching straps to components that aren’t intended to support transport loads.
The direction of the straps matters just as much as how tight they are.
Ideally, the front straps should pull the bike slightly forward and downward, while the rear straps help stabilize it from behind.
This opposing tension keeps the bike centered and reduces unnecessary movement during braking, cornering, and rough roads.
If the straps are nearly vertical, they provide less lateral stability. If they’re pulled too far outward, they may not hold the bike securely under changing road conditions.
One of the most common mistakes is tightening the front straps until the suspension is heavily compressed.
A moderate amount of compression is typically enough to help keep the bike stable.
Excessive compression can place unnecessary stress on suspension components during long trips.
The objective is stability—not maximum force.
Before driving away, gently push the handlebars from both sides.
The bike should feel secure without excessive movement.
Also check that:
Taking one extra minute for this inspection can prevent hours of frustration later.
For most day trips, removing the battery isn’t necessary unless the bike manufacturer specifically recommends it.
The battery is designed to remain securely mounted during normal riding, which includes vibration and impacts far greater than typical highway travel.
However, there are situations where removing it may make sense:
If you remove the battery:
In most situations, it’s better to transport an electric dirt bike in an upright position.
Keeping the bike upright reduces the risk of cosmetic damage and minimizes unnecessary pressure on controls, handlebars, plastics, and other components.
If laying the bike on its side is absolutely unavoidable:
An upright bike is almost always easier to secure and inspect once you reach your destination.
Pro Tip: After driving the first 10–15 miles, pull over in a safe location and check every strap. New straps can settle slightly as the bike shifts into its final position, and a quick re-tightening early in the trip helps prevent movement later.
Not every trip is the same. A short drive to your local riding area requires far less preparation than a full day on the highway or a weekend of changing weather.
Adjusting your transport routine to match the conditions helps reduce unnecessary wear and lowers the risk of damage before your ride even begins.
Rain won’t usually harm a properly secured electric dirt bike during a short drive, but prolonged exposure can leave moisture on metal components and electrical connectors.
If rain is unavoidable:
Leaving any vehicle parked in direct sunlight for extended periods can significantly increase interior temperatures.
If you’re transporting your bike during hot weather:
Long-distance travel places continuous vibration on both the motorcycle and the tie-down system.
During extended trips:
A two-minute inspection during a fuel stop is often enough to catch small problems before they become larger ones.
Even experienced riders occasionally overlook simple details.
Avoiding these common mistakes will help keep both your bike and your vehicle protected.
Two straps may keep the bike upright while parked, but they provide less stability during emergency braking, rough roads, or sharp turns.
Using front and rear tie-downs creates a much more secure transport setup.
Most transport damage doesn’t happen on the highway—it happens while loading or unloading.
Take your time, use a stable ramp, and don’t hesitate to ask for help if the bike feels difficult to control.
Brake lines, plastic body panels, wiring, and displays are never suitable tie-down points.
Always use structural attachment points recommended by the motorcycle manufacturer.
Road vibration can slightly change strap tension over time.
A quick inspection after the first few miles—and again during longer trips—is one of the simplest ways to prevent unwanted bike movement.
Before heading out on the trail, take a minute to make sure everything is exactly as it should be.
It’s a simple habit that can prevent surprises once you’re riding.
Once you’ve reached your destination, don’t rush to unload and ride immediately.
Instead, perform a quick walk-around inspection.
Check the following:
This inspection usually takes less than two minutes and provides peace of mind before your ride.
Before pulling away, run through this quick checklist.
| Item | Check |
|---|---|
| Bike powered off | ✓ |
| Battery properly secured | ✓ |
| Front wheel straight | ✓ |
| Four tie-down straps installed | ✓ |
| Soft loops positioned correctly | ✓ |
| Strap hooks fully engaged | ✓ |
| Loading ramp stored | ✓ |
| Riding gear and tools secured | ✓ |
| Final walk-around completed | ✓ |
Saving or printing this checklist can make transport day more organized, especially if you’re preparing for a long trip.
For most riders, a pickup truck, utility trailer, enclosed trailer, or cargo van combined with quality tie-down straps provides a safe and reliable transport solution.
Some lightweight models may fit inside larger SUVs with the seats folded down. Always measure the available cargo space first and secure the bike properly to prevent movement during transit.
No. The goal is to keep the bike stable, not to apply as much pressure as possible. Moderate compression is generally sufficient for a secure setup.
Using two front and two rear straps typically provides the best stability for most transport setups.
Usually not for everyday trips, unless recommended by the manufacturer or required for shipping or extended transport in extreme conditions.
A tightly fitted cover designed for transport may be suitable, but loose tarps can flap in the wind, trap moisture, and damage painted or plastic surfaces.
Inspect them after the first 10–15 miles and periodically during longer trips, particularly after driving on rough roads.
Brief exposure to rain is generally manageable, but drying the bike afterward—especially the chain and electrical connections—is a good maintenance practice.
Learning how to transport an electric dirt bike isn’t just about getting from one place to another—it’s about protecting your investment before the ride even begins.
A well-planned transport routine starts with the right vehicle, quality equipment, and secure tie-down techniques. Taking a few extra minutes to load the bike carefully, inspect your straps, and perform a quick safety check after arrival can help prevent unnecessary damage and give you confidence every time you travel.
Whether you’re driving a few miles to your local trails or crossing several states for a riding trip, transporting your bike the right way means you’ll spend less time worrying about your equipment and more time enjoying the ride.
Best Electric Dirt Bike Accessories Buying an electric dirt bike is only the beginning of the riding experience. Whether you
Altis Sigma vs Sur Ron Ultra Bee The electric dirt bike market has entered a new stage. Today’s riders are
Altis Delta vs Talaria Sting MX5 The electric dirt bike market has changed dramatically in recent years. Riders now have
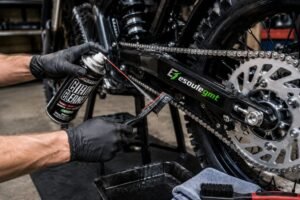
How to Clean an Electric Dirt Bike Chain A clean chain does more than make your electric dirt bike look
