Best Electric Dirt Bike Accessories: Essential Upgrades Every Rider Should Have
Best Electric Dirt Bike Accessories Buying an electric dirt bike is only the beginning of the riding experience. Whether you

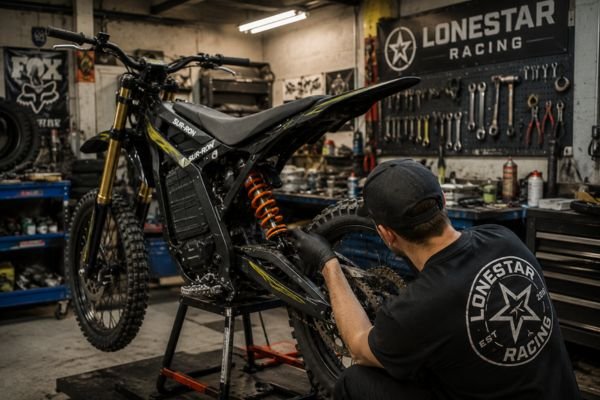
A powerful motor won’t make your electric dirt bike easier to ride if the suspension isn’t working properly.
Many riders assume poor handling is caused by the tires, the brakes, or even the bike itself. In reality, suspension setup has a much greater influence on how an electric dirt bike feels than most people realize.
A bike with correctly adjusted suspension will:
The opposite is also true.
If the suspension is poorly adjusted, the bike may dive excessively under braking, bounce over rough terrain, slide through corners, or feel unstable at speed.
The good news is that you don’t need to be a professional racer to improve your setup.
Most riders can dramatically improve their bike by making just a few simple adjustments.
This guide explains how electric dirt bike suspension works, how to set rider sag correctly, what compression and rebound damping actually do, and how to tune your suspension for different trails and riding styles.
Whether you own an ALTIS, Sur Ron, Talaria, E Ride Pro, or another electric dirt bike, the principles in this guide apply to almost every modern off-road model.
If you’re looking for the fastest starting point, use the manufacturer’s factory settings and adjust rider sag before changing anything else.
For most recreational riders, this provides an excellent baseline.
| Adjustment | Recommended Starting Point |
|---|---|
| Rider Sag | About 30% of total suspension travel |
| Fork Compression | Factory setting |
| Fork Rebound | Factory setting |
| Rear Shock Compression | Factory setting |
| Rear Shock Rebound | Factory setting |
Once rider sag is correct, you can begin making small adjustments to improve handling for your local terrain.
Suspension isn’t just there to make the ride more comfortable.
Its primary job is to keep the tires in contact with the ground.
Every time your tires lose contact with the trail, you lose traction.
That affects acceleration, braking, and cornering.
A properly tuned suspension allows the wheels to follow the terrain instead of bouncing across it.
The result is a bike that feels calmer, more predictable, and easier to control.
Think of suspension as the connection between your bike and the trail.
A powerful motor means very little if the tires can’t consistently transfer that power to the ground.
Electric dirt bikes place different demands on suspension than many traditional gas-powered models.
One reason is weight distribution.
The battery pack is usually the heaviest single component on the bike, and its position affects how weight is carried between the front and rear wheels.
Electric motors also deliver torque instantly.
Instead of gradually building power through engine speed, maximum torque arrives the moment you open the throttle.
That instant acceleration can cause the rear suspension to squat more aggressively, especially on loose terrain.
Good suspension setup helps control these weight transfers, improving stability during acceleration, braking, and cornering.
It’s one of the reasons riders often notice a dramatic improvement after only a few small adjustments.
Before turning any adjusters, it’s important to understand what each one actually changes.
Rider sag measures how much the suspension compresses when you’re sitting on the bike in full riding gear.
It’s the foundation of every suspension setup.
If rider sag is incorrect, every other adjustment becomes less effective.
Getting sag right should always be your first priority.
Preload doesn’t make the suspension stiffer.
Instead, it changes the amount of force required before the suspension begins moving.
Adjusting preload mainly affects ride height and rider sag.
Many riders mistakenly use preload to compensate for the wrong spring rate.
If excessive preload is required to achieve proper sag, a different spring may be the better solution.
Compression damping controls how quickly the suspension compresses when it encounters bumps.
Too little compression allows the suspension to dive or bottom out too easily.
Too much compression makes the bike feel harsh and reduces grip over rough terrain.
Finding the right balance improves both comfort and control.
Rebound damping controls how quickly the suspension returns after being compressed.
If rebound is too fast, the bike may kick or bounce after hitting bumps.
If rebound is too slow, the suspension may not recover before the next obstacle, making the bike feel heavy and unresponsive.
Correct rebound damping helps the tires stay in contact with the trail.
Ask ten suspension tuners where to begin, and you’ll almost always hear the same answer:
Start with rider sag.
Nothing has a greater influence on overall handling.
Rider sag determines the bike’s ride height, weight distribution, steering characteristics, and suspension balance.
Without proper sag, even expensive suspension components can’t perform as intended.
For most electric dirt bikes used on trails, a rider sag of approximately 30% of total rear suspension travel is an excellent starting point.
For example:
| Rear Suspension Travel | Recommended Rider Sag |
| 180 mm | 54 mm |
| 200 mm | 60 mm |
| 220 mm | 66 mm |
| 250 mm | 75 mm |
Always check sag while wearing your normal riding gear, including your helmet, boots, hydration pack, and any equipment you typically carry.
Even a few extra pounds can influence the measurement.
Before measuring anything, your bike may already be telling you something is wrong.
Here are a few common symptoms.
| Bike Feels Like… | Possible Cause |
| Difficult to turn into corners | Too much rear sag |
| Nervous or unstable at speed | Too little rear sag |
| Front wheel pushes wide | Rear suspension sitting too low |
| Rear end feels tall | Too little rider sag |
| Bike feels balanced but harsh | Sag may be correct—look at damping next |
These aren’t absolute rules, but they’re useful clues when diagnosing handling problems.
One of the biggest mistakes riders make is adjusting multiple settings at the same time.
For example:
If the bike feels better—or worse—you won’t know which adjustment made the difference.
Instead, change one setting at a time, then ride the same section of trail again.
Keep notes if possible.
Experienced suspension tuners often make only one or two clicks of adjustment before testing the bike again.
Small changes are much easier to evaluate than large ones.
Once rider sag is set correctly, the next adjustment to focus on is compression damping.
Compression damping controls how quickly the suspension compresses when the wheel hits a bump, lands from a jump, or dives under braking.
Think of it as the suspension’s resistance to being compressed.
Finding the right balance is important because both extremes create problems.
If compression damping is too soft, the suspension compresses too easily. The bike may feel comfortable on small bumps, but it will dive excessively during braking and bottom out on larger impacts.
If compression damping is too firm, the suspension resists movement. While this may feel stable on smooth trails, the bike can become harsh over rocks and roots because the wheels struggle to follow the terrain.
You may need more compression damping if you notice:
Recommended adjustment: Increase compression by 1–2 clicks, then test the bike again.
Too much compression often creates the opposite feeling.
Watch for these symptoms:
Recommended adjustment: Reduce compression by 1–2 clicks and ride the same trail again.
The key is making gradual changes rather than large adjustments.
After compression is dialed in, rebound damping becomes much easier to tune.
Rebound controls how quickly the suspension extends after it has been compressed.
This adjustment has a huge influence on stability.
Too much or too little rebound can make an otherwise capable bike feel unpredictable.
When rebound is too fast, the suspension returns too quickly after absorbing a bump.
Typical symptoms include:
Recommended adjustment: Slow the rebound by 1–2 clicks.
If rebound is too slow, the suspension doesn’t recover before the next bump.
This is often called packing down.
Common signs include:
Recommended adjustment: Speed up rebound by 1–2 clicks.
Instead of guessing which adjuster to turn, use the bike’s behavior as a guide.
| If Your Bike Feels Like… | Most Likely Cause | Recommended Adjustment |
|---|---|---|
| Front dives when braking | Compression too soft | Add 1–2 clicks of compression |
| Rear kicks after bumps | Rebound too fast | Slow rebound slightly |
| Bike bottoms out | Compression too soft or spring too light | Increase compression or check spring rate |
| Front pushes wide in corners | Too much rear sag | Reduce rider sag slightly |
| Bike feels harsh everywhere | Compression too firm | Reduce compression |
| Rear tire struggles for traction | Shock too stiff | Soften compression slightly |
This table won’t replace proper suspension testing, but it gives you a reliable starting point for diagnosing common handling issues.
Every trail places different demands on the suspension.
The ideal setup for rocky mountain trails isn’t necessarily the best choice for deep sand or smooth hard-packed terrain.
Use these recommendations as starting points.
| Terrain | Compression | Rebound | Recommended Sag |
|---|---|---|---|
| Forest Trails | Medium | Medium | 30% |
| Rocky Terrain | Slightly Softer | Medium | 30% |
| Sand | Softer | Slightly Slower | 31–32% |
| Mud | Medium | Medium | 30% |
| Hard Pack | Slightly Firmer | Medium-Fast | 28–29% |
| Motocross Track | Firmer | Medium | 27–28% |
Remember that these are setup guidelines rather than fixed rules.
Small adjustments based on rider preference are completely normal.
Absolutely.
Your body weight has a major influence on suspension performance.
Factory settings are often designed around an average rider, typically in the range of 165–180 lbs (75–82 kg).
If you’re significantly lighter or heavier, the bike may not perform as intended.
Here’s a general guideline.
| Rider Weight | Suggested Adjustment |
|---|---|
| Under 150 lbs (68 kg) | Factory settings are usually fine. |
| 150–180 lbs (68–82 kg) | Start with factory setup. |
| 180–220 lbs (82–100 kg) | You may need a small preload increase. |
| Over 220 lbs (100+ kg) | Consider a heavier spring if excessive preload is required. |
Preload should help achieve proper rider sag—not compensate for an incorrect spring rate.
If you need to add excessive preload just to reach the recommended sag, a different spring is usually the better solution.
Even experienced riders occasionally fall into these habits.
Changing compression, rebound, and preload together makes it almost impossible to know which adjustment improved—or worsened—the bike.
Always make one change at a time.
Many riders immediately begin turning clickers without checking sag.
This is like aligning a car before installing the correct tires.
Sag should always be your starting point.
Your friend’s setup may feel terrible on your bike.
Differences in weight, riding speed, terrain, and personal preference all influence suspension performance.
Use recommended settings as a starting point—not a final answer.
Consistency matters.
Whenever possible, test suspension changes on the same section of trail.
That makes it much easier to feel the effect of each adjustment.
Professional suspension tuners rarely make dramatic adjustments.
Instead, they follow a repeatable process.
Patience almost always produces a better setup than making large adjustments all at once.
If you only make one adjustment, make it rider sag.
Correct rider sag creates the proper balance between the front and rear suspension and establishes the foundation for every other suspension setting.
Without the correct sag, changing compression or rebound damping usually won’t solve handling problems.
You don’t need to make adjustments before every ride.
However, it’s worth checking your setup whenever:
Most riders only need small adjustments rather than a completely new setup.
Yes—but keep it simple.
New riders should focus on:
There’s no need to chase professional race settings. A balanced, predictable bike builds confidence much faster than an aggressively tuned one.
Suspension sag is the amount the suspension compresses under the rider’s weight.
It helps determine ride height, weight distribution, steering characteristics, and traction.
For most recreational trail riding, approximately 30% of total rear suspension travel is an excellent starting point.
Indirectly, yes.
A poorly adjusted suspension can reduce traction, causing unnecessary wheel spin and forcing the motor to work harder.
While the effect isn’t as significant as tire pressure or riding style, a well-balanced suspension can improve efficiency on rough trails.
Often, yes.
Electric dirt bikes have different weight distribution because the battery pack is usually the heaviest component on the bike.
They also produce instant torque, which creates different weight transfer during acceleration.
Although the basic suspension principles remain the same, many electric dirt bikes benefit from setup adjustments that reflect these characteristics rather than copying settings from a comparable gas-powered motorcycle.
If you’ve added a large amount of preload but still can’t achieve the recommended rider sag, the spring rate may be too soft for your weight.
Similarly, if you must remove almost all preload to reach proper sag, the spring may be too stiff.
Changing springs is often a better solution than relying on excessive preload.
Service intervals vary by manufacturer and riding conditions, but regular inspections are essential.
If you ride frequently in mud, sand, or water, suspension seals and bushings should be checked more often.
Watch for:
Routine maintenance keeps suspension working as intended and helps extend component life.
Before heading to the trail, spend a few minutes checking the items below.
It can save hours of frustration later.
Developing a consistent routine helps ensure every ride starts with the bike performing at its best.
If you’re unsure where to begin, use these settings as a reliable baseline for recreational trail riding.
| Adjustment | Recommended Starting Point |
|---|---|
| Rider Sag | Around 30% of rear suspension travel |
| Fork Compression | Factory setting |
| Fork Rebound | Factory setting |
| Shock Compression | Factory setting |
| Shock Rebound | Factory setting |
| Fine-Tuning | Adjust only 1–2 clicks at a time |
After each adjustment, ride the same section of trail and evaluate the difference before making further changes.
The goal isn’t to create the softest or firmest suspension.
It’s to make the bike feel predictable.
You’re moving in the right direction if you notice:
When the suspension is working well, the bike becomes easier to ride—not harder.
Suspension tuning often sounds complicated, but it doesn’t have to be.
Most riders don’t need expensive modifications or professional race settings to enjoy a dramatic improvement in handling.
Start with the basics.
Set rider sag correctly.
Ride the bike.
Pay attention to how it reacts.
Then make small, deliberate adjustments to compression and rebound until the bike feels balanced on the terrain you ride most often.
Remember that suspension setup is personal.
The perfect settings for another rider may not work for you because rider weight, riding style, speed, and local trails are all different.
Instead of chasing someone else’s clicker settings, build your own setup gradually.
Keep notes, make one change at a time, and let the trail tell you what works.
A well-tuned suspension doesn’t just make an electric dirt bike more comfortable—it improves traction, increases confidence, reduces fatigue, and allows you to enjoy every ride a little more.
Continue improving your bike with these guides:
Best Electric Dirt Bike Accessories Buying an electric dirt bike is only the beginning of the riding experience. Whether you

Altis Sigma vs Sur Ron Ultra Bee The electric dirt bike market has entered a new stage. Today’s riders are

Altis Delta vs Talaria Sting MX5 The electric dirt bike market has changed dramatically in recent years. Riders now have
How to Transport an Electric Dirt Bike Whether you’re heading to a local trail, traveling to a race, or taking
